Sunflowers and Sandblasting

It’s been quite a year for 2020, and a crazy year for me since last September. I broke my leg while setting up for a craft show and had to have surgery to repin it. Yup, leave it to me! I’m still dealing with a torn MCL that they didn’t find prior to surgery so I still have trouble bending my leg (although the break itself has long since healed). The first week of February my husband and I decided that since the virus wasn’t on the east coast anywhere yet, we’d head down to Atlanta and then on to Orlando. Lucky me, I came down with a very mild case of Covid-19- I’ve since heard of people who had it in November-January – all on the east coast of the USA. Later I had a tear on my muscles up under my ribs, giving me a scare about my heart. Whew! What a year – and we’re only part-way through!

Enough about all that, though. I’ve been in my studio designing up new things. One of which is sandblasting! I design in Illustrator, cut the image in vinyl with my Cricut, then place that onto the glass. Then it’s sandblasting with a 220 carbide grit. The fun part it peeling away the vinyl to see the image in glass! Then I break out my paints or alcohol inks and dye it so it’s extra special. That’s how I did the words, ABBY and the date, above.

Keepsake Box with Removable Invitation

keepsakebox removable top
Sometimes I will make a box that will allow the customer to remove the invitation. It’s usually because I don’t have the invitation, or I have an imperfect one. I can still ship to the customer so that they receive the gift on time, and they save time not shipping another one to me. I make them with double panes of clear glass, and the customer can slide the invitation in.

The first time I made one like this was for a customer who said her brother was getting married–again! This was his third wedding and she said she didn’t expect this one to last either, so could I please make it so the woman can slide in a photo or something later 🙂

The next time was for someone who had red fingernail polish on when she slid the invitation into the envelope. It left scratches on the invitation and it was a type of paper where I couldn’t scrape at it without making more damage. We didn’t have time for her to send me another one before the wedding. A recent one was for a customer who was attending a wedding in Tanzania and didn’t have the opportunity to get a physical invitation until she arrived there.

I don’t make them this way all the time, because it’s more work for me and it may slide around later on. When I design one like this I have to align it correctly. I need to make sure it’s going to slide in nicely but not have so much room that it will move around each time someone opens the box and that it has enough room so the customer won’t damage the new one getting in! I’ve been making clips to hold the invitation on the inside of the lid.

So here’s how to remove and replace an invitation if you do get a removable insert box.

and to insert:

Save

Save

Multiple Colors in an Invitation Box

Lately I’ve been making glass boxes with multiple colors for the tops and sides. I was always afraid to do them this way, but they’ve come out great! I think my hesitation stemmed from my thought that they wouldn’t be “serious” enough of the occasion, but now I feel they enhance the invitation and make it known that this was a special occasion. A box that shouts, “Look at me!” in a good way.

stained glass bat mitzvah giftstained glass wedding invitation box

Fun and Funky Bat Mitzvah Gift

stained glass keepsake box Abby_side Abby_front
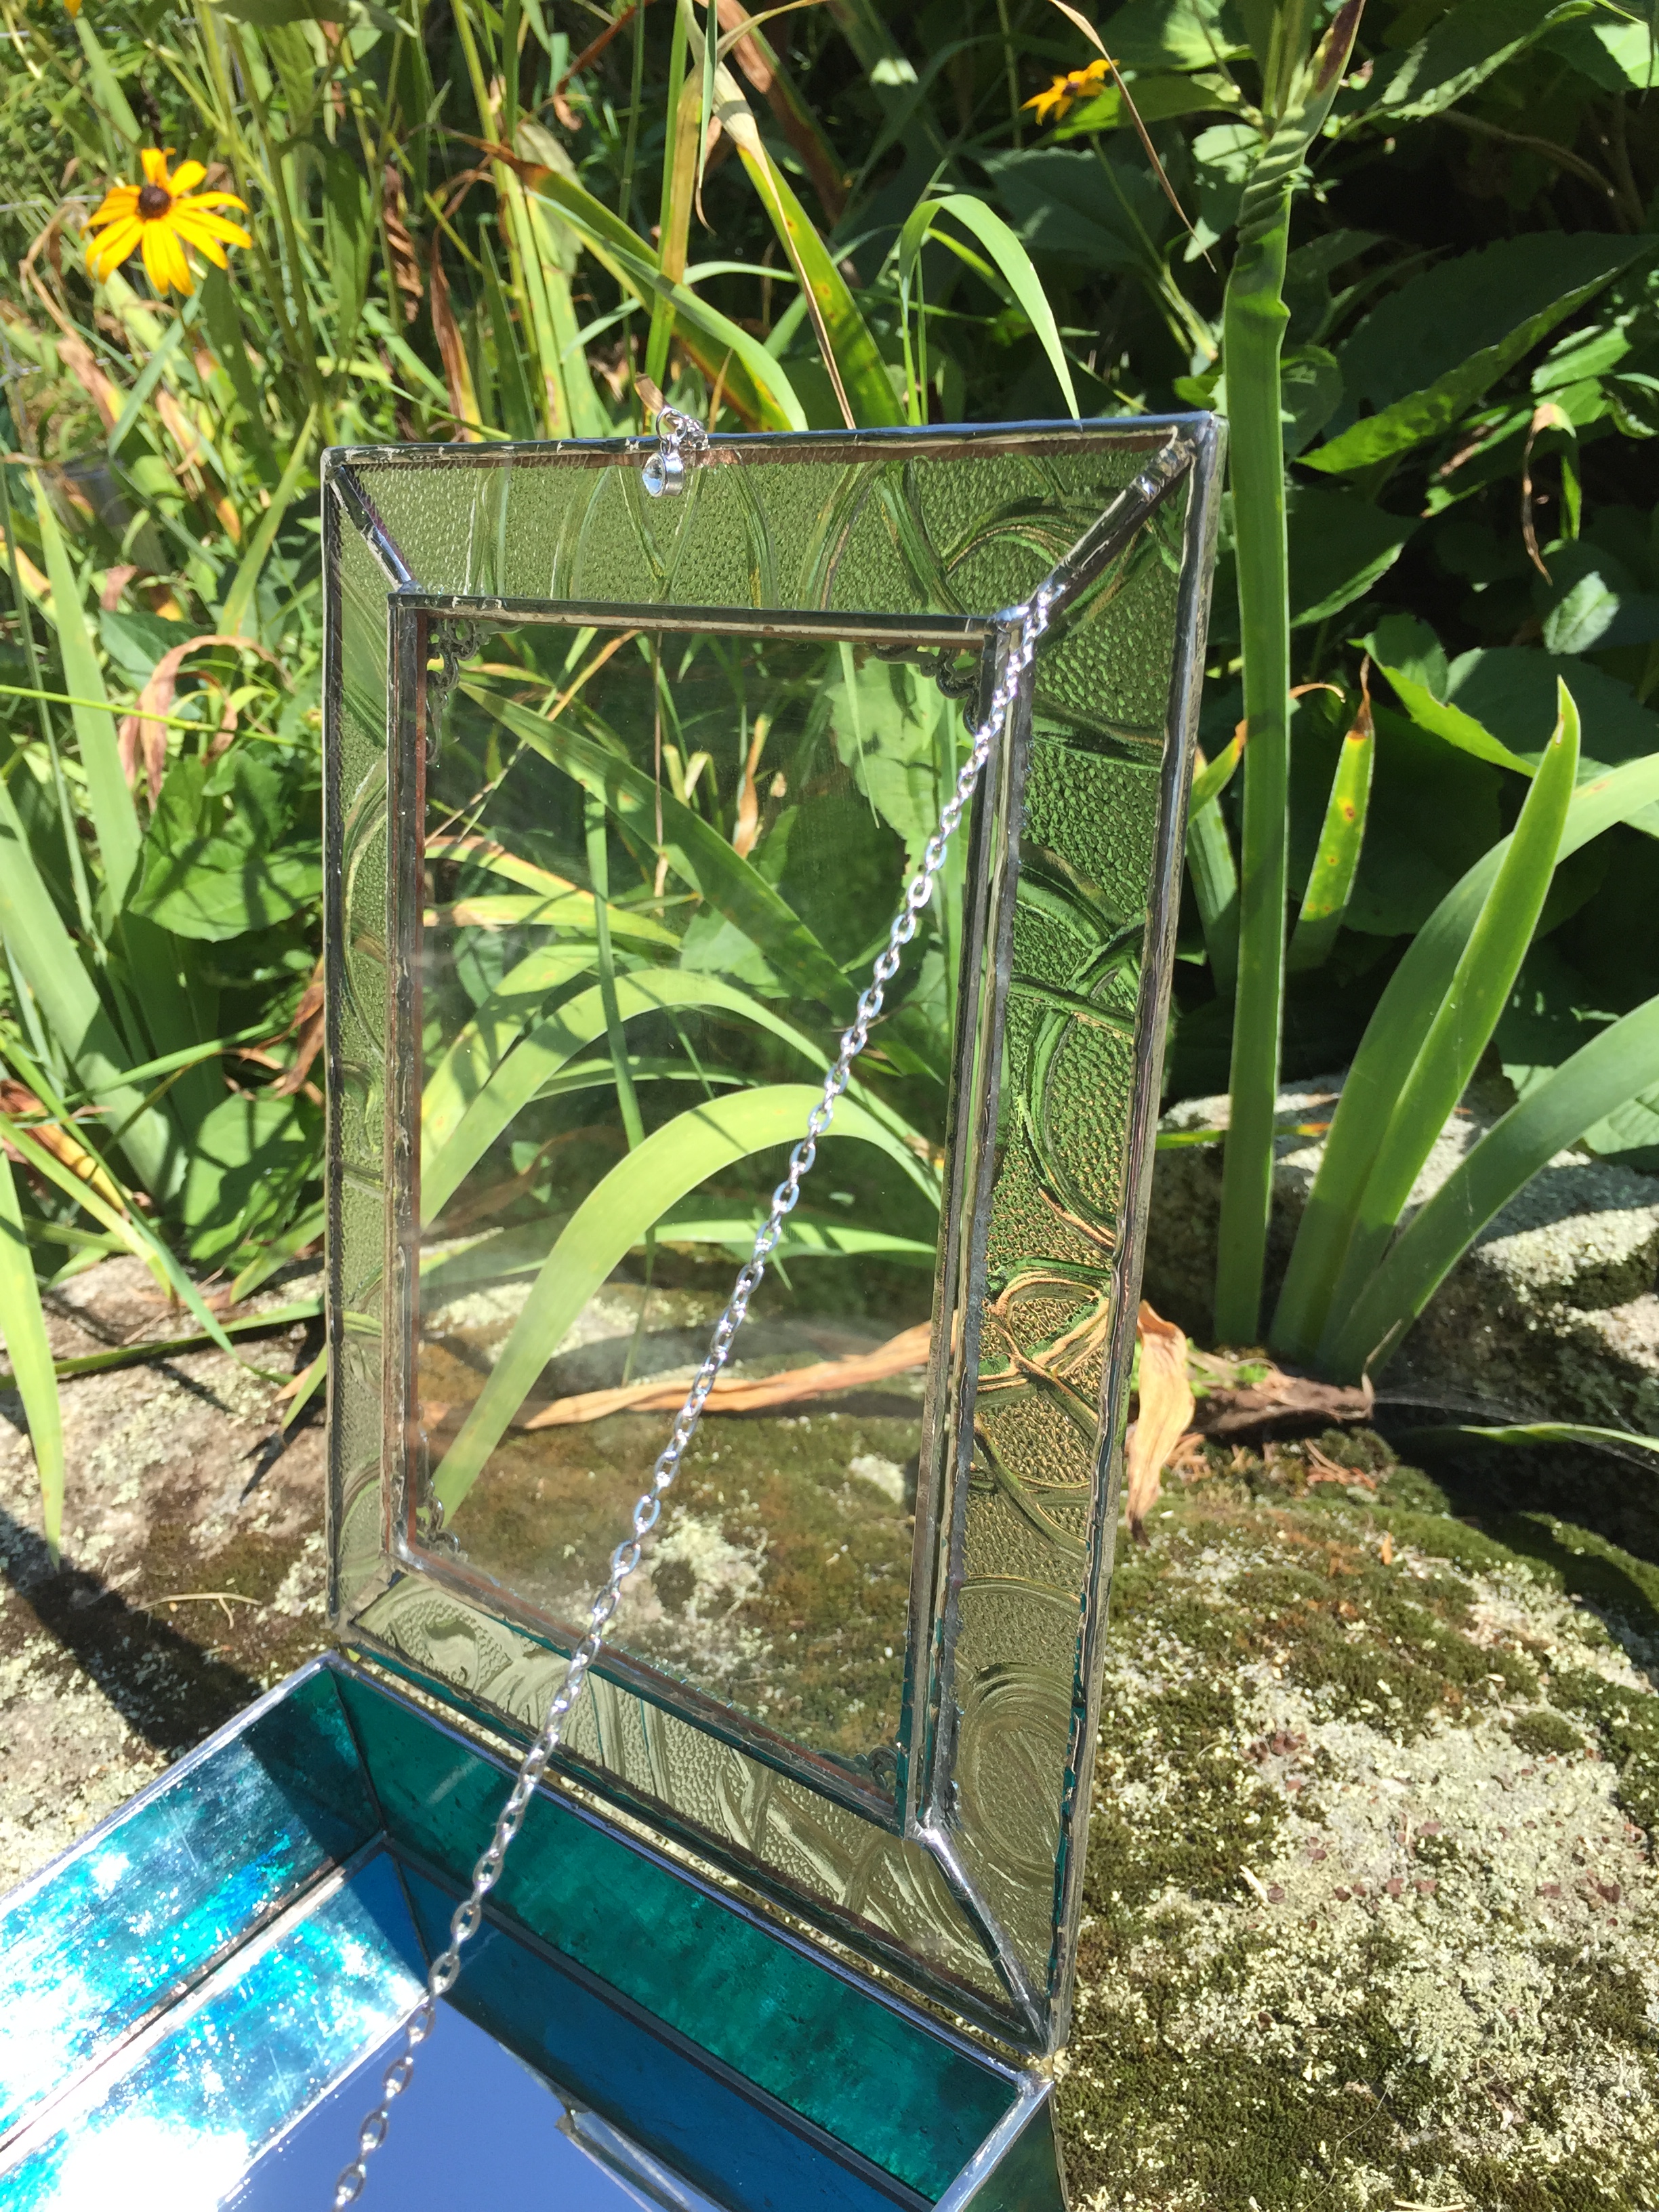
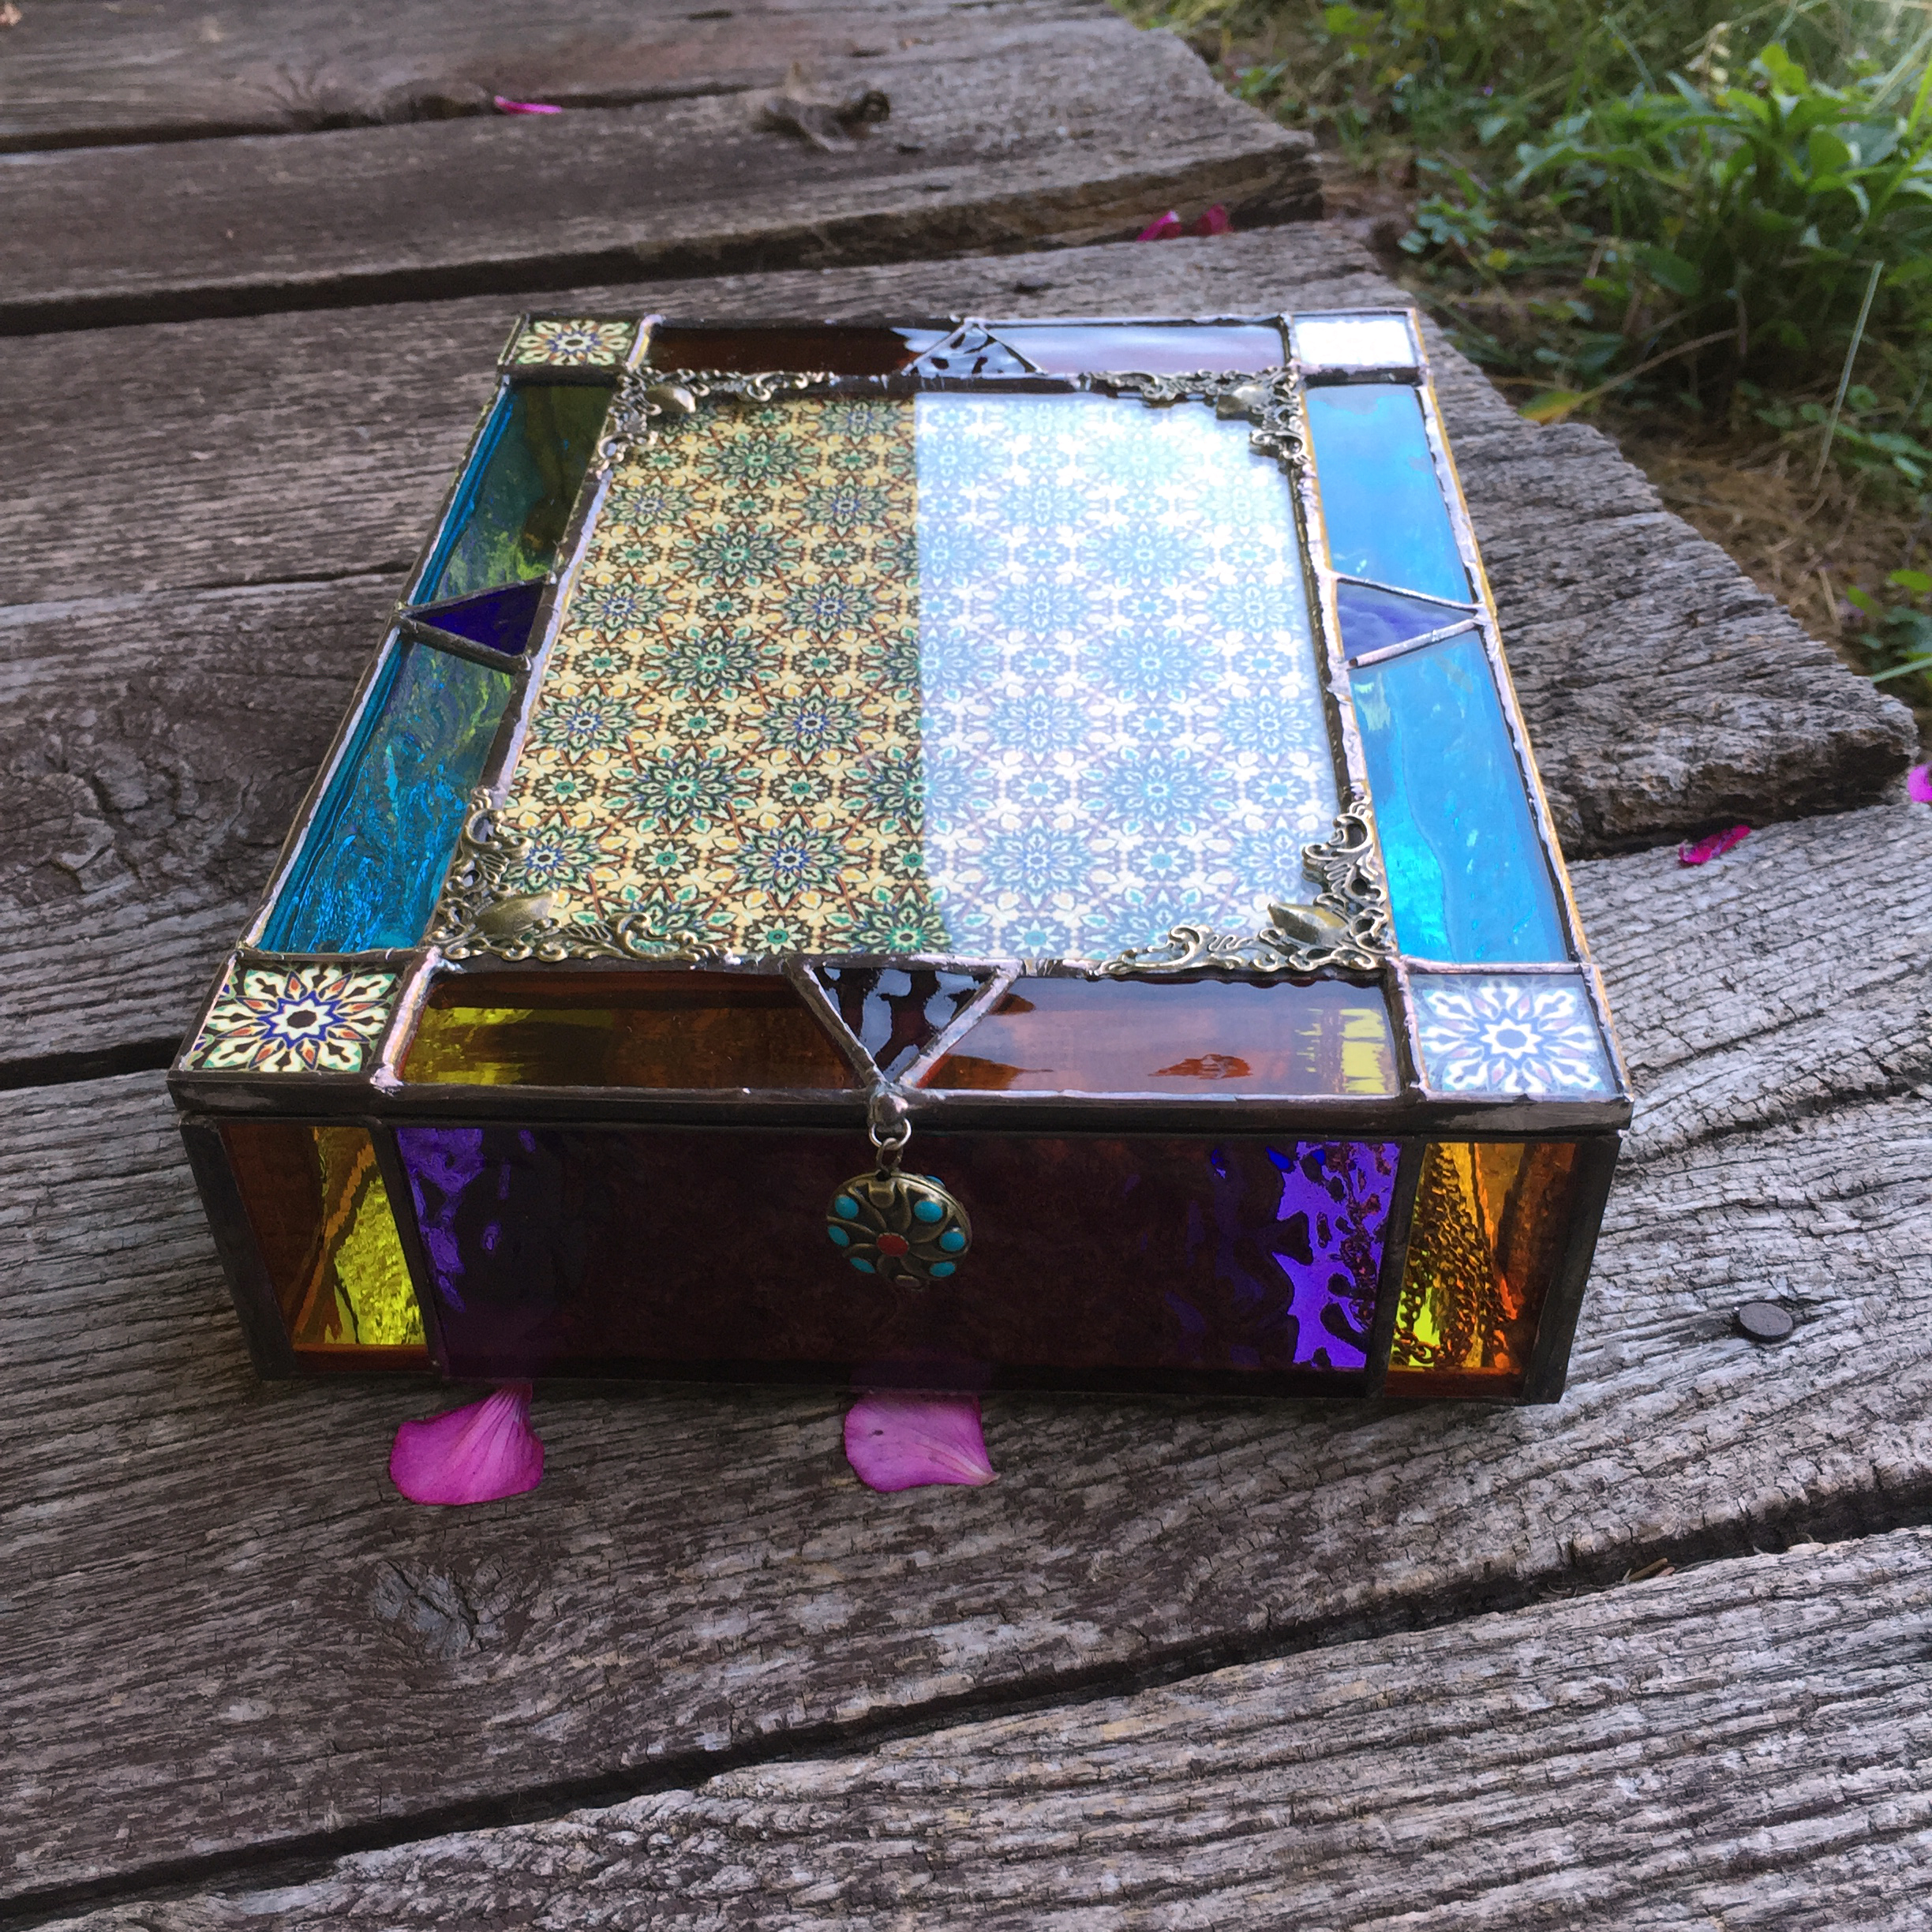
I was recently asked to make a keepsake invitation box for a girl who’s “fun”. Her aunt asked me to make it “fun & funky” to fit her personality. The invitation itself was so colorful it was easy to design around. We decided to make sure it had lots of color, so I extended the bands of color around the sides of the box. I hear she loves it!

Pressed Flower Invitation Box

stained glass invitation box

It’s been  such a long time since I’ve posted – truth is, I’ve been so busy this year that I couldn’t take on any additional work, so I didn’t want to encourage it. This past Spring and Fall I was helping out with the CT Renaissance Faire for their Robin Hood and King Henry Vlll shows, painting sets. Now that it’s winter I can take on more of my own projects. So here’s a box that I did this earlier this year with pressed flowers. It’s for a Bat Mitzvah but does show two names – two girls had theirs together. I love using textured glass for the sides, this pattern is called “Thistle” and comes in amber, blue or clear. I only press some of the flowers myself as I haven’t had time to get into too many varieties of ones that press well. My mom presses some, and the rest come from a woman in  Washington State, except for the four-leaf clovers which I purchased online. Maybe it’s cheating to use GMO clovers – but they’re so cool!

Stained Glass boxes for Bat Mitzvah Invitations

Here’s a few of the stained glass boxes that I’ve made for Bat Mitzvah invitations. They are fun to make, each one comes out different, which keeps me interested as an artist.

They take me about 4-5 hours to do, and that’s not including going to the fabric store for the fabric to make the padded inserts! I also include seashells, crystals, semi-precious stones, beads – whatever looks good!